How To Shoot a Bottle of Beer — St. Stefanus Blonde
For the past 18 months, I have photographed bottles of beer for my friends of Une Petite Mousse. On their web site, you subscribe to receive every month a box of six bottle of beers. The selection changes every month and contains a mix of well-known beers and others from micro-breweries. It is a great way to discover and taste new beers that you can not find in a store near you.
They need pictures of the bottles for their online catalogue and the paper guide that comes in the boxes.
Making photographs of a bottle of beer is suprisingly challenging. I want to give on overview of the color of the beer inside the bottle (which are often made of a dark glass) while highlighting the label on the front of the bottle. In order to build the catalogue, I want to have an uniform style for all pictures with a pure white background and a square format (to keep the respective size of the bottles).
In this post, I'll explain the process I have used for the latest box (available mid-september). For september 2014, one of the beers is the St. Stefanus Blonde, brewed in Belgium.

The picture above is from their web site (I really like how the strips of white emphasize the roundness of the small bottle).
Gear
To photograph this bottle, I used the following material:
- Fuji X-E2 camera
- Fuji 56mm ƒ/1.2 lens (which is my lens with the longest focal length)
- 2 Flash Speedlights (Yongnuo YN560-III and Nikon SB-700) in manual mode. I plugged the Nikon SB-700 on a Yongnuo RF-603/N3 to trigger it remotely
- a Yongnuo YN560-TX plugged on the camera hotshoe to control remotely the speedlights
- my trusty Giotto's Vitruvian tripod to stabilize the camera
- many white foam boards (for the background and below the bottle)
- many black foam boards (used as gobos to block the light)
Before explaining my process, I heartily recommend to read Light Science and Magic: An Introduction to Photographic Lighting. This book is an invaluable help to understand how light plays with shapes and textures.
Setup
The first step is to place the bottle and the various white and black foam boards that will give the bottle a distinctive shape. In order to highlight the color of the beer inside the bottle, I will light white foam boards in the background. The light will bounce on the boards and go through the bottle before reaching the camera. The background will be overexposed to be pure white.
I also want to have well-defined edges on the bottle. I place two black foam boards on each side of the white background. These black boards will appear on the edges of the bottle and increase the contrast and sharpness of its shape. Without these black boards, the light coming from the white background would splill on the edges and make them too soft.
I put the bottle on a white foam board (with a plexiglass to have a small reflection at the bottom). Finally, I put other black foam boards on each side of the bottle and on top of it to prevent any leaking light to reach it.
I then place the camera at the right distance of the bottle to have it fill the image height. The image will be cropped to square in post-processing. I activate the X-E2 guides on its screen to have a good overview of the final size.

Once the camera is correctly placed, I fine tune the placement of the black boards on each side of the white background. They must be placed so that the edges of the bottle are dark but not too close so that they fill the inside of the bottle.
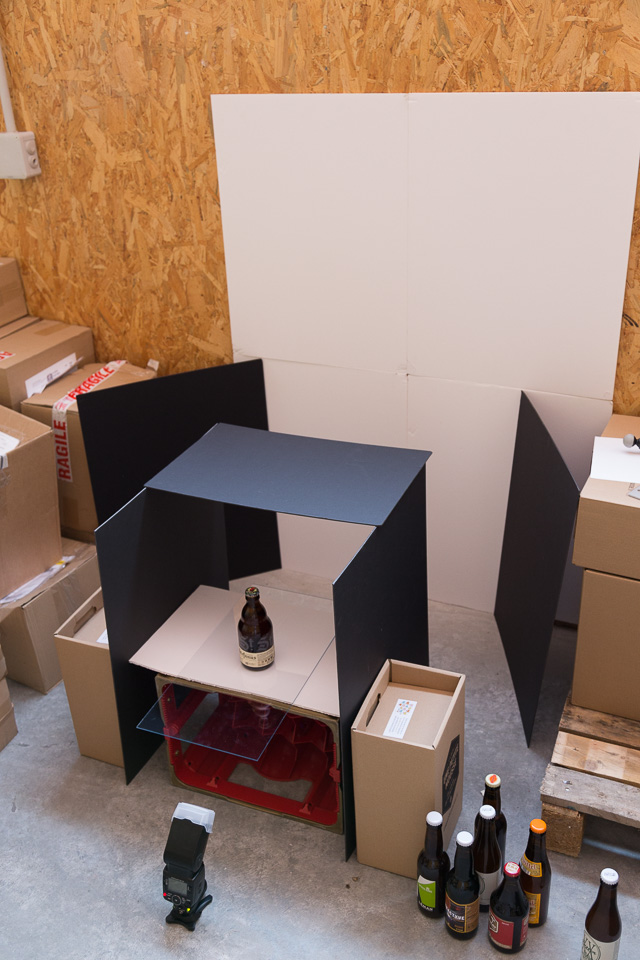
I put the bottle on top of a small box to be able to place the flashes below it (so that they do not appear on the photos) and angle them appropriately to light the scene.
I want to control the lighting and block any ambient light (the garage where I took the photos has lights coming from windows that can not be easily blocked). I configure my camera to 1/180 (the highest sync speed for the X-E2) and ISO 400. The lens is stopped down to ƒ/8 to have enough depth of field.
With these settings, the image is so dark that I know I will not be bothered by any ambient light (the photo is cropped but no other postprocessing has been applied).

Next step is to place the two flashes and provide the lighting.
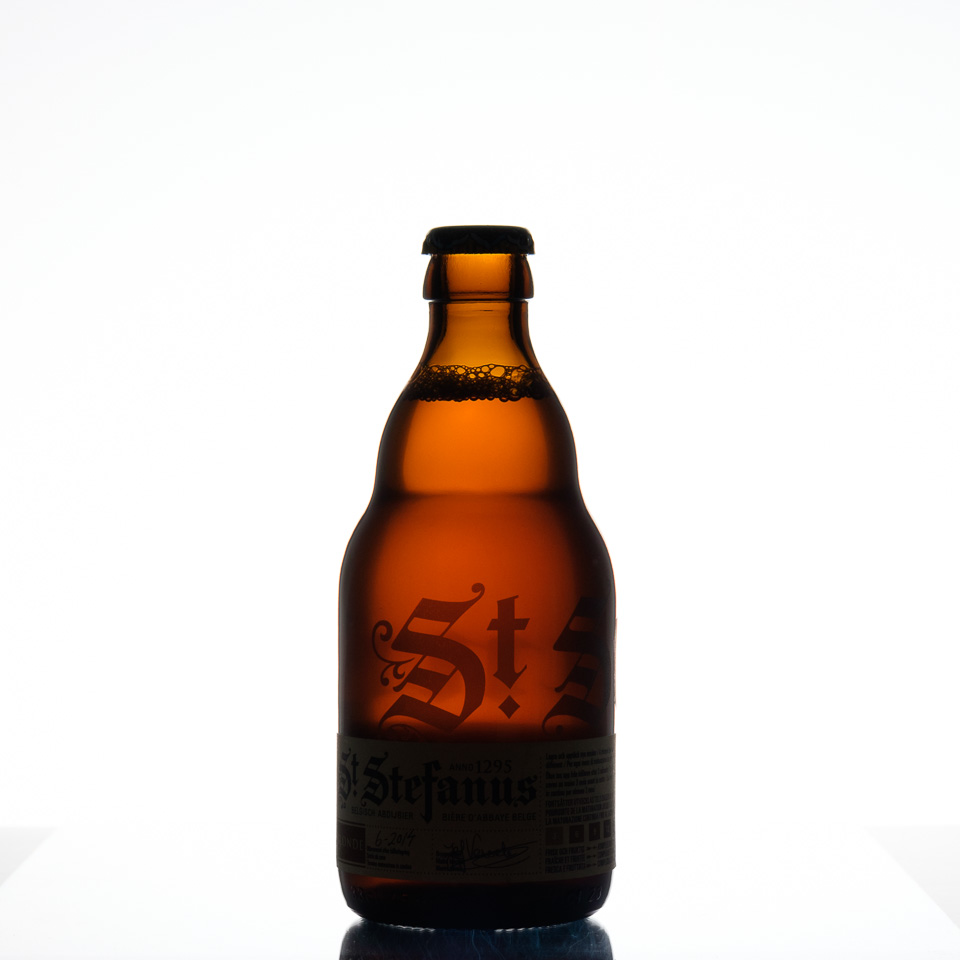
Back (Main) Light
The main light is provided by the flash behind the bottle. It is directed towards the white background and will light the bottle after bouncing on the background. I use the Yongnuo YN560-III zoomed at 24 mm with a diffuser to spread the light on the white background.
When I take the picture, I can see that the beer inside the bottle is well lit and the background is overexposed to pure white. Thanks to the black foam boards, the edges of the bottle are dark and sharp enough (the photo below is cropped but no other postprocessing has been applied).
Front (Fill) Light
The liquid inside the bottle is lit but there is no light reaching the label on the front of the bottle.
I then to use the second flash (Nikon SB-700) to light only the label. The placement of the flash is tricky because it can easily create highlights on the glass if it is not properly directed. I place it below the bottle with an angle of 45° or so. It is fully zoomed at 135 mm to focus its light on the label. With this angle and zoom, the flash will lit the paper label but most of the light reaching glass will not be captured by the camera.
The photo below shows the bottle lit by the front flash only (the photo below is cropped but no other postprocessing has been applied).
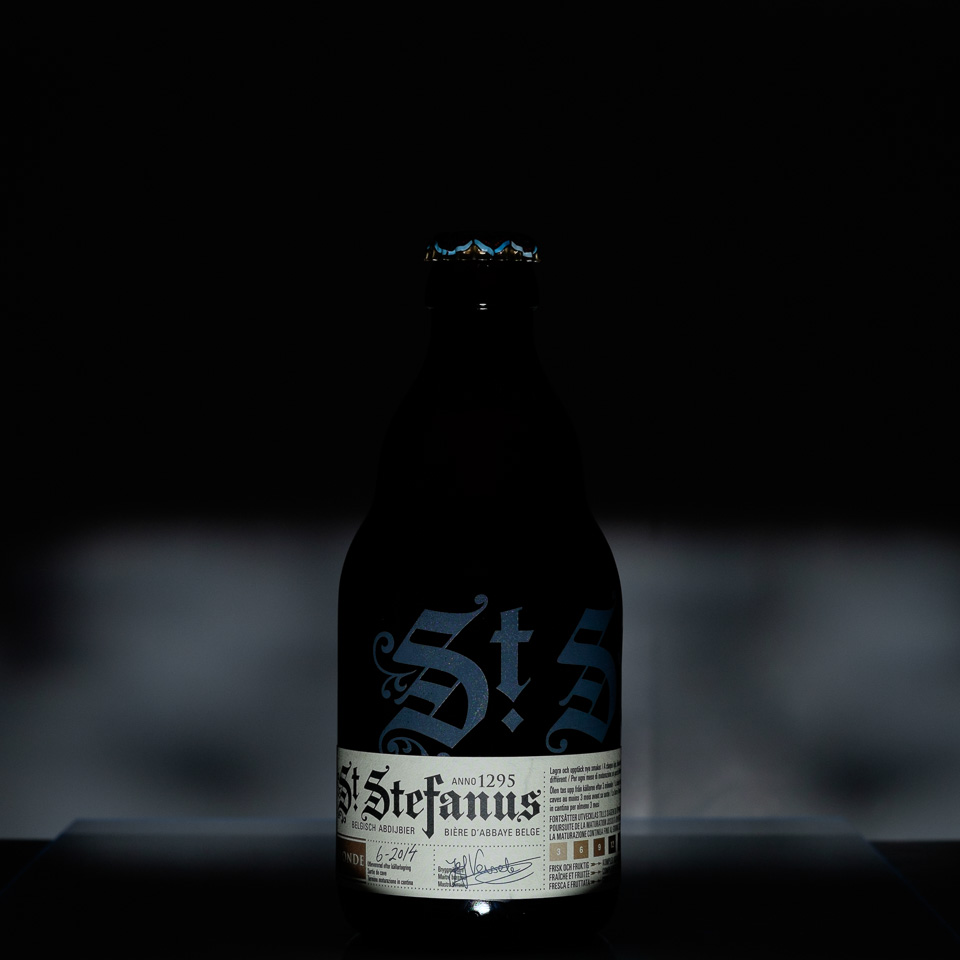
We can see there are two highlights on the bottom of the bottle and near its neck. They are small enough that I will be able to remove it in post processing.
Final Picture
Once the two speedlights are setup, I tweak their power to have a correct ratio between the back and front lights. At then, I use the following ratio:
- Back (main) light 1/16 +0.3EV
- Front (fill) light 1/64 -0.3EV
When I take the picture with both the back and front lights, I capture the final (cropped but unprocessed) picture below.
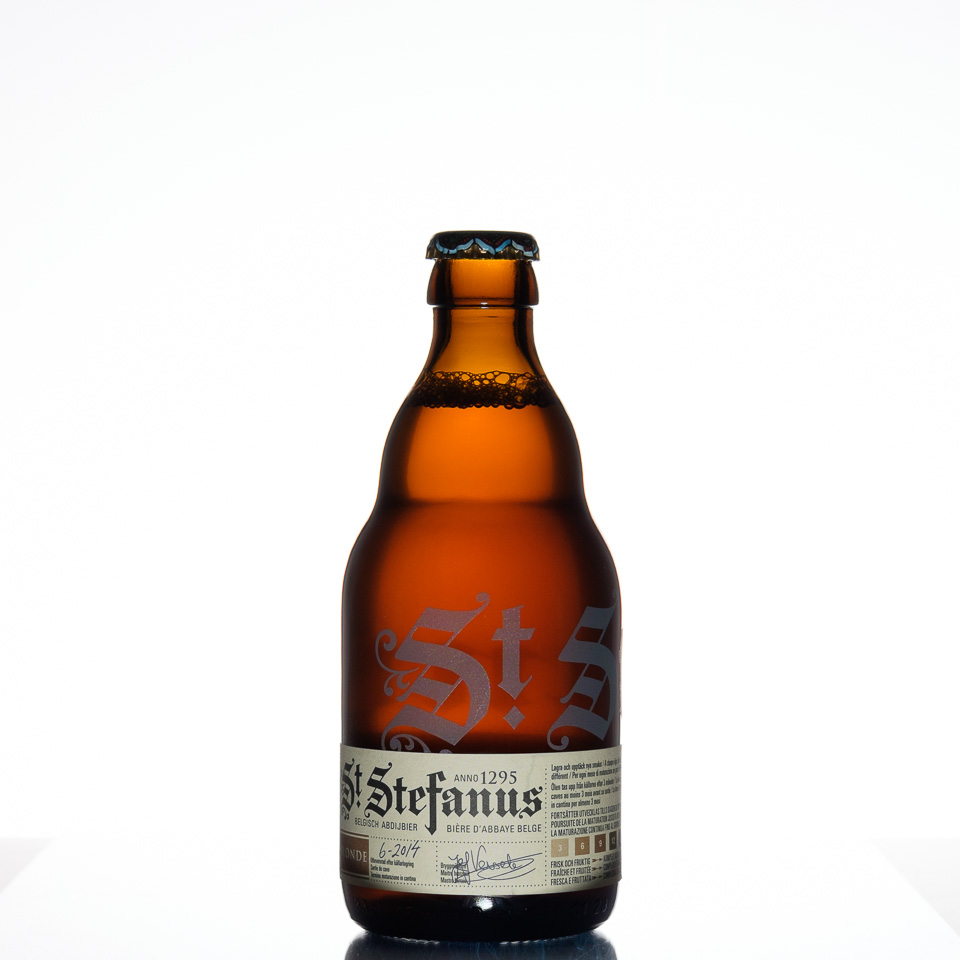
Most of the work is now done and I just need a few touches of post-processing to finalize the image.
Post-Processing
I use Lightroom for the image post-processing.
Once the image is imported, I correct the lens distorsions and crop the image to a square format.
I slightly modify its global setting in the Basic module:
- I fix its white balance (using a photo of the scene with a grey card)
- I punch its Tone
- +0.75 Exposure
- +41 Contrast
- +26 White
- -63 Black
- I increase its Presence
- +16 Clarity
- +26 Vibrance
- -4 Saturation
- I also increase the sharpness in the Details module (+52 Sharpening).
The numbers are meaningless. They are different for each bottle, depending mainly on the color and texture of the liquid and glass. The goal with any of these settings is to have a pure white background and a bottle that is well exposed and contrasted.
I use the Spot Removal tool to remove the highlights caused by the front flash at the bottom of the bottle and near its neck.
Last step is to use a few Adjustment Brushes to finalize the images:
- darken the bottle reflection on the plexiglass
- lighten the bottom corners of the label (that's a mistake I did not catch when capturing the image)
- sharpen and increase contrast of the label (to have the text standout)
I finally export it in JPEG and hand it over to Barbara, the graphist designer of Une Petite Mousse, that uses it for the paper guide and the web site.

Since March 2013, I have photographed more than one hundred different beers1 and each one is a different challenge. The shape of the bottle changes, the color of the liquid and the glass change too. Some have dark labels, others have golden labels. Some do not have labels at all and the text is put directly on the glass.
I am always tweaking and refining the process to capture all these subtle differences and I am sure that I will continue to do so for as long as I take pictures and enjoy it.
Santé! 🍻
- and I have tasted all of them! :) ↩